
A Little Introduction from My Kitchen
Japanese-style choux cream puffs have a special charm. Their beautifully rounded shells, delicate crisp crust, and generous filling of silky custard make them irresistible. Inspired by the famous Japanese choux à la crème and the signature crunchy pai-shuu topping found in Japanese bakeries, this recipe brings together French pastry techniques and the refined textures loved in Japan.
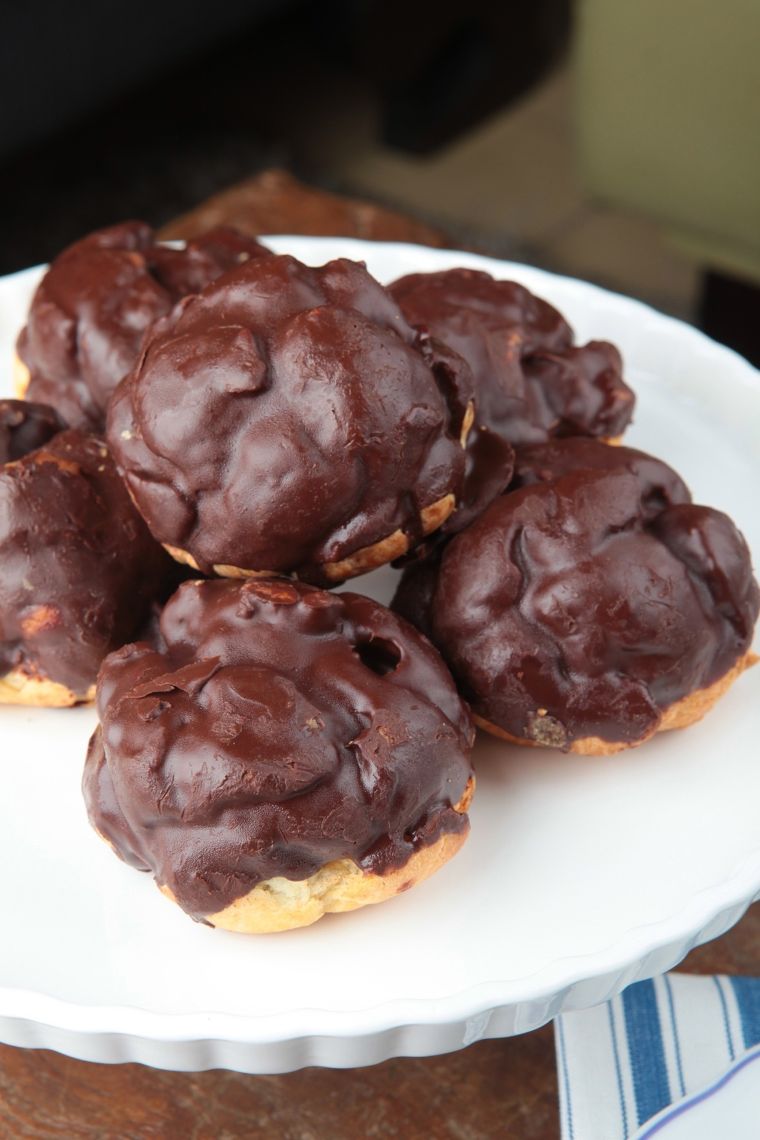
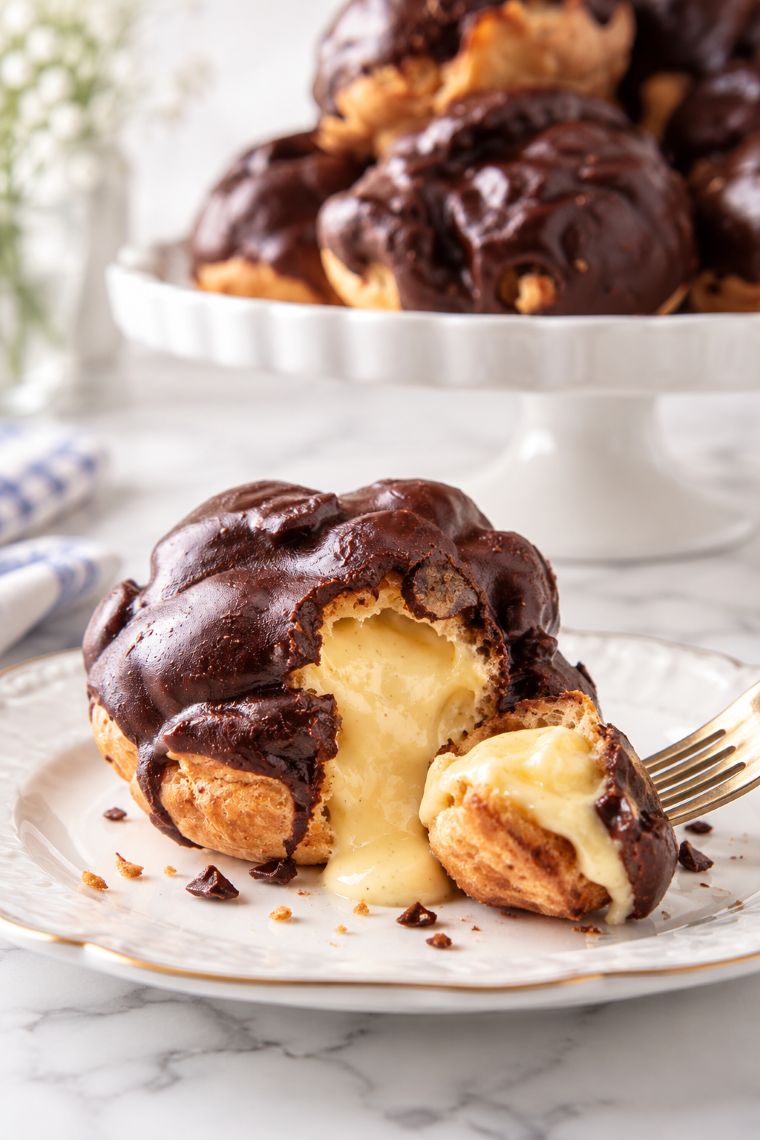
What makes this version special is the contrast between the crisp, lightly sweetened crust, the airy choux pastry, and the smooth chocolate-dipped finish. Inside, a rich vanilla custard is folded with softly whipped cream to create a filling that is creamy without feeling too heavy.
Choux pastry can seem intimidating at first, but once you understand how the dough should look and feel at each stage, it becomes much easier to master. The secret is to cook the flour properly, add the eggs gradually, pipe evenly sized puffs, and allow the shells to dry thoroughly in the oven.
Take your time with each step. Good pastry is not about rushing; it is about understanding the ingredients and giving them the attention they deserve.

Japanese Chocolate Choux Cream Puff
Course: DessertCuisine: Japanese, FrenchDifficulty: Intermediate1
servings1
hour15
minutes1
hour15
minutes380
kcalKeep the screen of your device on
Ingredients
- A. Japanese-Style Choux Pastry
120 g unsalted butter, cut into small cubes
180 ml water
160 g plain flour, sifted
5 large eggs, approximately 50 g each without shells, lightly beaten
¼ teaspoon fine salt
1 teaspoon caster sugar
Important note about the eggs: The five eggs are a guide, not an amount you must use regardless of the dough's consistency. Depending on the flour, humidity, and how much moisture evaporates during cooking, you may need slightly less or more. Add the final portion gradually.
- B. Crispy Pai-Shuu Crust
This thin, sweet crust sits on top of the choux pastry and creates the characteristic crunchy Japanese bakery finish.
30 g unsalted butter, softened
40 g icing sugar, sifted
40 g plain flour
½ teaspoon baking powder, optional
For a more delicate, biscuit-like crust, omit the baking powder. If you prefer a slightly more raised and crumbly topping, include it.
- C. Vanilla Custard Cream
120 g caster sugar
45 g plain flour
4 large egg yolks
720 ml whole milk
30 g unsalted butter
1 vanilla bean, split and scraped, or 2 teaspoons pure vanilla extract
- D. Light Whipped Cream
200–250 ml cold whipping cream, approximately 35% fat
15–20 g icing sugar, optional
Folding whipped cream into the chilled custard creates a lighter, more delicate filling similar to the cream found in many Japanese bakeries.
- E. Chocolate Glaze
115 g semisweet or dark chocolate, finely chopped
120 ml heavy cream
10 g unsalted butter, optional, for extra shine
Choose chocolate containing approximately 50–60% cocoa for a balanced finish that is rich but not overly bitter.
Method
- Step 1 — Prepare the Vanilla Custard Cream
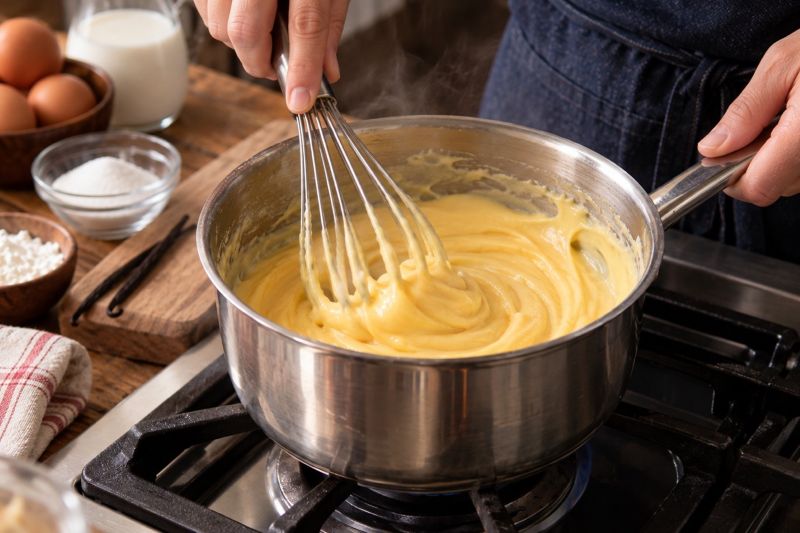 Make this several hours ahead, preferably the day before.
The custard must be completely cold before you fold in the whipped cream or use it to fill the puffs.
1. In a medium heatproof bowl, whisk together the sugar and flour until evenly combined.
2. Add the egg yolks and approximately 40–60 ml of the milk. Whisk until the mixture becomes smooth and pale, with no dry flour or lumps remaining.
3. Pour the remaining milk into a saucepan. Add the scraped vanilla seeds and the pod if using a vanilla bean.
4. Heat the milk over medium heat until steaming and just beginning to simmer around the edges. Do not allow it to boil vigorously.
5. Remove the vanilla pod.
6. Slowly pour about one-third of the hot milk into the egg yolk mixture while whisking continuously. This gradually warms the yolks and helps prevent them from scrambling.
7. Pour the warmed egg mixture back into the saucepan with the remaining milk.
8. Return the saucepan to medium heat and whisk continuously, making sure to scrape the bottom and corners of the pan.
9. As the mixture heats, it will gradually thicken. Continue whisking until it produces slow, gentle bubbles.
10. Once the custard has thickened and bubbled, cook for another 30–60 seconds while whisking to ensure the flour is properly cooked.
11. Remove from the heat and immediately whisk in the butter until completely melted and incorporated.
12. Pass the custard through a fine sieve if necessary to remove any small lumps.
13. Transfer to a shallow container and cover the surface directly with food-safe plastic wrap to prevent a skin from forming.
14. Cool promptly and refrigerate at 4°C or below until completely cold, preferably for at least 3–4 hours.
Sandra's kitchen tip: Do not stop stirring once the custard begins to thicken. It can catch on the bottom of the pan very quickly. Continuous whisking creates a smooth, glossy custard.
If the custard seems too thick after refrigeration, whisk it gently until smooth before folding in the whipped cream. - Step 2 — Lighten the Custard with Whipped Cream
This step gives the filling its delicate, creamy texture.
1. Place the cold whipping cream in a chilled mixing bowl.
2. Add the optional icing sugar.
3. Whip using an electric mixer until medium peaks form. The cream should hold its shape but still look smooth and soft.
4. Remove the cold custard from the refrigerator and whisk it gently until smooth.
5. Add one-third of the whipped cream to the custard and stir gently to loosen the mixture.
6. Fold in the remaining whipped cream in two additions using a spatula.
7. Stop as soon as the mixture is evenly combined and light. Overmixing can deflate the cream and make the filling loose.
8. Cover and refrigerate until ready to use.
The texture to aim for: Smooth, airy, and creamy, with enough body to hold inside the puff without running out when bitten.
Keep the filling refrigerated while you prepare the pastry. - Step 3 — Prepare the Pai-Shuu Crust
The pai-shuu crust is the little detail that makes these cream puffs feel special. It adds a delicate sweetness and a crisp, biscuit-like layer over the airy shell.
1. Place the softened butter in a small bowl.
2. Add the sifted icing sugar and mix with a spatula until smooth and creamy.
3. Add the flour and optional baking powder.
4. Mix until a soft dough forms. Avoid overworking it.
5. Place the dough between two sheets of baking paper.
6. Roll it out evenly to approximately 2–3 mm thick.
7. Transfer the rolled dough, still between the paper sheets, to a flat tray.
8. Refrigerate for 20–30 minutes until firm.
9. Cut out 12–14 circles, approximately 4–5 cm in diameter, depending on the size of your piped choux.
10. Keep the discs refrigerated until you are ready to bake.
Sandra's kitchen tip: The crust must be firm and cold when placed on the piped dough. If it becomes soft or sticky, return it to the refrigerator before continuing. - Step 4 — Prepare the Choux Pastry
This is the most important stage of the recipe. The goal is to create a smooth, elastic dough that can hold its shape while expanding in the oven.
Prepare your equipment first
- Preheat the oven to 200°C using conventional top-and-bottom heat.
- Line two baking trays with baking paper.
- Fit a piping bag with a plain round nozzle approximately 12–15 mm wide.
- Sift the flour and measure the remaining ingredients before starting.
Make the dough
1. Place the butter, water, salt, and sugar in a medium saucepan.
2. Heat over medium heat, stirring occasionally, until the butter has completely melted and the liquid comes to a full boil.
3. Remove the saucepan from the heat immediately.
4. Add all the sifted flour at once.
5. Stir vigorously with a wooden spoon or heatproof spatula until the flour absorbs the liquid and forms a thick dough.
6. Return the saucepan to medium-low heat.
7. Continue stirring and pressing the dough against the bottom of the pan for approximately 1–2 minutes. The dough should come together into a smooth ball and leave a thin film on the base of the saucepan.
8. Transfer the dough to a clean mixing bowl.
9. Spread it around the sides of the bowl for a minute or two to release excess steam and allow it to cool slightly. It should be warm, not piping hot, before you add the eggs.
Why this matters: Cooking the flour with the liquid gelatinises the starch and helps the dough absorb moisture. This creates the structure needed for the puffs to rise and form a hollow centre.
Add the eggs gradually
1. Lightly beat the eggs in a separate bowl.
2. Add a small portion of the beaten egg to the warm dough.
3. Stir firmly until the egg is completely absorbed. At first, the mixture may look slippery or separated. Keep mixing until it comes together.
4. Continue adding the egg in small portions, mixing thoroughly after each addition.
5. As the dough becomes smoother and glossier, reduce the amount of egg added at a time.
6. Stop frequently to check the consistency, especially when you are nearing the end of the measured eggs.
How to know when the choux is ready
Lift some dough with your spatula and let it fall back into the bowl. The dough should form a thick, smooth ribbon that slowly drops from the spatula, leaving a V-shaped trail.
It should be glossy and pipeable, but not runny. If it falls off the spatula in a thin stream, it may contain too much egg.
You may not need all five eggs. If the dough is already smooth and reaches the correct consistency, stop adding egg.
Sandra's kitchen tip: Adding too much egg is one of the most common reasons choux pastry spreads flat instead of rising tall. Always judge the dough by its consistency rather than the number of eggs used. - Step 5 — Pipe the Cream Puff Shells

1. Transfer the prepared choux dough into the piping bag.
2. Hold the piping bag vertically, with the nozzle approximately 1 cm above the lined tray.
3. Pipe even mounds approximately 4–4.5 cm wide, applying steady pressure and keeping the nozzle in one place.
4. Stop squeezing before lifting the nozzle away.
5. Leave approximately 5 cm between each mound to allow room for expansion.
6. If the tops have small peaks, dip a finger in water and gently smooth them down.
7. Remove the pai-shuu crust discs from the refrigerator.
8. Place one disc on top of each piped mound, centring it gently without pressing the choux flat.
If you do not want to use the pai-shuu topping, lightly brush the choux with a little egg wash or leave it plain. The finished shells will still rise, although the crust will have a different texture.
For uniform puffs: Use a template beneath the baking paper as a size guide, then remove it before piping. Consistent sizing helps all the shells finish baking at the same time. 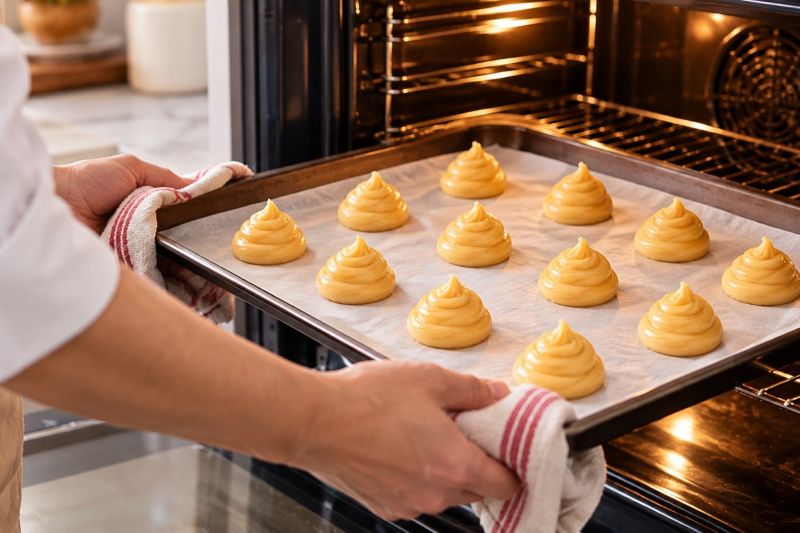
Choux pastry relies on steam to expand. Once the shells have risen, they must remain in the oven long enough to dry out and become strong enough to hold their shape.
1. Place the tray on the middle rack of the preheated 200°C oven.
2. Bake for approximately 15 minutes without opening the oven door.
3. Reduce the temperature to 180°C and continue baking for approximately 20–25 minutes, until the puffs are well risen and a deep golden colour.
4. Avoid opening the oven while the shells are expanding. A sudden drop in temperature can cause them to collapse.
5. Once the shells are well browned, reduce the temperature to 150–160°C and bake for another 10–15 minutes to help dry the interior.
6. Check that the shells feel light and firm rather than soft or damp. If necessary, extend the drying time in 5-minute increments.
7. Remove one shell and allow it to cool briefly. If the inside remains very wet or doughy, return the remaining shells to the oven for additional drying.
8. For extra dryness, turn the oven off, pierce a small hole in the bottom of each shell with a skewer or small knife, and leave them in the switched-off oven with the door slightly ajar for 5–10 minutes.
9. Transfer the shells to a wire rack and cool completely before filling.
Important: Oven temperatures and baking times vary, especially with fan-assisted ovens. If using a fan oven, you may need to reduce the temperatures slightly and monitor the shells closely.
Sandra's kitchen tip: Colour is your guide. Pale choux shells often collapse because the interior has not dried enough. Look for a well-browned, firm shell rather than removing them as soon as they puff.- Step 7 — Prepare the Chocolate Glaze
A smooth chocolate glaze gives the cream puffs a polished finish without overwhelming the delicate custard.
1. Finely chop the chocolate and place it in a heatproof bowl.
2. Heat the cream in a small saucepan until steaming and just beginning to simmer around the edges.
3. Pour the hot cream over the chopped chocolate.
4. Leave undisturbed for 1–2 minutes to allow the chocolate to soften.
5. Stir slowly from the centre outward until the mixture becomes smooth and glossy.
6. Add the optional butter and stir until fully incorporated.
7. Let the glaze cool for a few minutes until it thickens slightly but remains fluid enough for dipping.
If the glaze is too thick, add a teaspoon of warm cream at a time. If it is too thin, let it cool a little longer before dipping.
For a beautiful finish: Avoid whisking too vigorously, as excess air can create bubbles on the surface of the glaze. 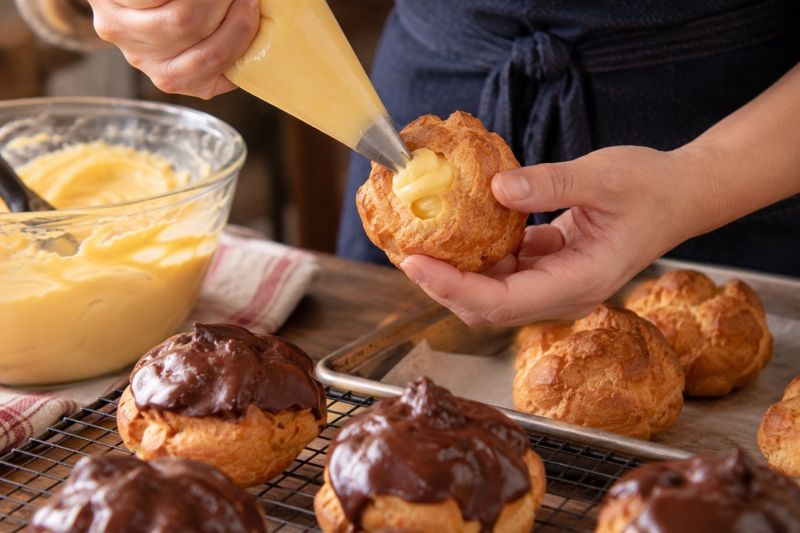
For the best contrast of textures, fill the shells as close to serving time as possible.
1. Make sure the baked shells are completely cool.
2. Transfer the chilled vanilla cream into a piping bag fitted with a small round or filling nozzle.
3. Make a small hole in the bottom of each puff using a small knife or piping nozzle.
4. Insert the nozzle into the opening and pipe the cream slowly into the centre.
5. Stop when the puff feels heavier and the filling just begins to reach the opening. Avoid forcing in too much cream, which can split the shell.
6. Wipe away any excess filling from the base.
7. Arrange the filled puffs on a tray and refrigerate while you prepare for glazing.
If you prefer, you can cut the tops off the shells and fill them with a spoon or piping bag, then replace the tops. Filling through the base gives a neater exterior.
Sandra's kitchen tip: A good cream puff should feel generously filled, but the shell should remain intact. If the filling pushes through the sides, use slightly less cream per puff.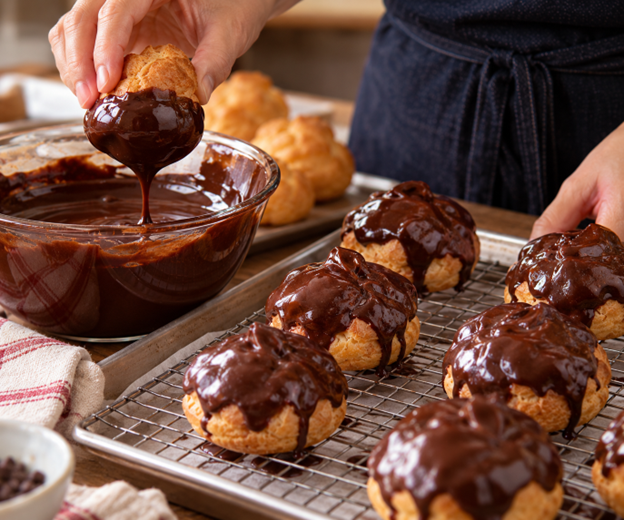
1. Hold each filled cream puff gently by its base.
2. Dip the top into the slightly cooled chocolate glaze.
3. Lift slowly and allow the excess chocolate to drip back into the bowl.
4. Turn the puff upright and place it on a tray lined with baking paper.
5. Repeat with the remaining puffs.
6. Refrigerate briefly until the glaze is set, or serve once the glaze has reached your preferred consistency.
For an elegant bakery-style finish, keep the chocolate coating smooth and even. You can also sprinkle a few finely chopped roasted hazelnuts over the glaze before it sets, if you enjoy a little extra crunch.