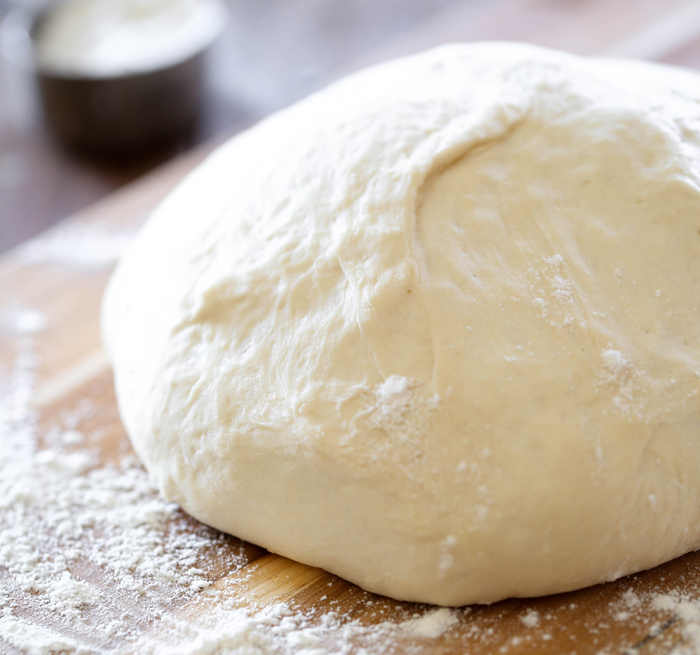
Homemade Pizza Dough
Course: MainCuisine: ItalianDifficulty: EasyServings
3
servingsPrep time
20
minutesCalories
138
kcalCook Mode
Keep the screen of your device on
Ingredients
Metric conversions are approximate. For flour, the amount needed depends on how the original cups were measured, so follow the texture cues as well.
2½ cups warm water, approximately
¼ cup granulated sugar, approximately
3 tsp instant yeast, approximately
¼ cup vegetable oil or olive oil, approximately
6 cups all-purpose flour, approximately 720–750 g, plus a little extra if needed
2 tsp fine salt
A little additional oil, for greasing the bowl
Additional flour, for shaping
Yield note: With these metric quantities, each of the three portions will weigh approximately 480–500 g, slightly more than 1 lb.
Directions
- Prepare your equipment.
Set out a large mixing bowl, a dough scraper or spatula, and a clean bowl for rising.
If using a stand mixer, fit it with the dough hook and check its recommended dough capacity. This is a large batch; divide it into two batches if necessary. - Combine the water, sugar, and yeast.
Pour the warm water into the mixer bowl. It should feel comfortably warm, approximately 35–40°C, rather than hot.
Add the sugar and instant yeast, then stir.
You can continue directly to the next step with instant yeast. Alternatively, leave it for about 5 minutes to check for signs of activity. Small bubbles may appear, although instant yeast does not always produce a thick layer of foam. - Add the oil.
Pour in the oil and stir briefly to combine. - Mix the flour and salt separately.
In another bowl, stir the flour and salt together so the salt is evenly distributed.
Keep a little of the measured flour aside initially—you may not need all of it. - Gradually incorporate the flour.
With the mixer on low speed, add the flour mixture approximately ½ cup at a time.
Let each addition mix in before adding the next. Stop occasionally and scrape down the bowl.
As the dough develops, it will change from a loose batter into a soft, sticky mass. Add the reserved flour gradually, stopping when the dough gathers together and can be lifted away from the bowl with a scraper.
It may still cling to the bottom of the bowl and to your fingers. That is expected. - Mix until cohesive and elastic.
Continue mixing on the mixer’s recommended dough-kneading speed, usually low, for approximately 4–6 minutes, checking the texture regularly.
The dough should become more cohesive and stretchy, although it will remain sticky. It does not need to form a stiff ball that leaves the bowl completely clean.
If it still pours like thick batter, add extra flour 1 tablespoon at a time, mixing well before deciding whether it needs more.
By hand: Stir the ingredients together with a sturdy spoon until no dry flour remains. Rest for 10 minutes, then use a scraper and lightly oiled hands to stretch and fold the dough over itself repeatedly for several minutes, until more cohesive. Avoid adding large amounts of flour just to make kneading easier. - Transfer to an oiled bowl.
Lightly grease a large bowl. Scrape the dough into it, then turn the dough so its surface is lightly coated with oil.
Cover with a lid, reusable cover, or plastic wrap, leaving enough room for expansion. - Let the dough rise.
Leave at room temperature for approximately 1 hour, or until doubled in volume.
Look for dough that is visibly puffed, airy, and roughly twice its original size. Use its appearance as your guide: a warm kitchen may speed things up, while a cooler room may require longer. - Preheat the oven and baking surface.
During the rise, place a pizza stone or baking steel in the oven, following its manufacturer’s instructions.
Preheat to 245–260°C / 475–500°F, or the highest temperature suitable for your oven and baking surface. Allow at least 30 minutes for the surface to heat thoroughly.
If using a regular baking tray, lightly oil it and shape the pizza directly on the tray. - Divide the dough.
Lightly flour your work surface and turn out the risen dough.
Use a scraper to divide it into 3 equal portions, or 4 portions for thinner pizzas. Weigh them if you want evenly sized pizzas.
Handle gently; there is no need to knead the dough again. - Shape into balls and rest.
For each portion, pull the edges towards the underside, working around the dough to create a smooth top. Pinch the underside together lightly.
Place the balls on a lightly floured surface or oiled tray, cover, and rest for 15–20 minutes.
This short rest relaxes the dough and makes stretching easier. - Stretch or roll out.
Work with one dough ball at a time, keeping the others covered.
Press gently from the centre outwards, leaving a slightly thicker border if you want a raised crust. Lift and rotate the dough, allowing its weight to help it stretch.
For the three-portion batch, aim for approximately 30–35 cm diameter, depending on your preferred thickness.
If the dough keeps shrinking back, cover it and rest for another 5–10 minutes, then try again.
A rolling pin also works well if you prefer a flatter, more even crust. - Add sauce and toppings.
Place the shaped dough on a lightly floured pizza peel or your prepared baking tray.
Spread with a modest amount of pizza sauce, leaving the edges clear. Add cheese and your preferred toppings.
Keep toppings reasonably light and drain wet ingredients well so the centre can bake properly. Raw meat toppings should be cooked before adding. - Bake until golden.
Slide the pizza onto the hot stone or steel, or place the prepared tray in the oven.
Bake for approximately 8–12 minutes, checking from 8 minutes onwards. A thicker pizza or a regular baking tray may need longer.
The pizza is ready when:
• The edges are puffed and golden.
• The underside is browned and set.
• The cheese is melted and bubbling.
• The centre is cooked through, with no wet, raw dough.
Rotate during baking if your oven browns unevenly. - Rest briefly, slice, and serve.
Transfer to a board or cooling rack and rest for 2–3 minutes before slicing.
Repeat with the remaining dough, allowing the stone or steel to recover its heat between pizzas.
Notes from Sandra
- A little sticky is a good thing.
Use a dough scraper or lightly oiled hands to manage the dough. Adding too much flour can make the finished crust heavy and dry.
Give stubborn dough a rest.
If it resists stretching, it usually needs a few more minutes to relax. Cover it, step away briefly, and come back.
Be careful with baking paper.
Only use parchment within its stated temperature limit. Many papers are not rated for the temperatures used in this recipe. A pizza peel or suitable baking tray is a better choice when the oven temperature exceeds that limit.
For overnight preparation.
After the first rise, divide and shape the dough into balls. Place in lightly oiled, covered containers with plenty of room to expand, then refrigerate and use within 24 hours.
Before shaping, let the dough stand at room temperature for approximately 30–60 minutes, until relaxed enough to stretch easily.
To make half the recipe:
• 1¼ cups warm water, approximately 295 ml
• 2 tbsp sugar
• 1½ tsp instant yeast
• 2 tbsp oil
• 3 cups all-purpose flour, approximately 360–375 g
• 1 tsp fine salt
Divide into two medium pizzas, or three smaller, thinner pizzas.
From My Kitchen to Yours — Sandra Djohan